Install Your Own Twin Cities-Grown Sod with Our Installation Guide
The following guideline will help to give your sod the best care, from installation to maturity.
Soil Preparation
If possible, you should kill any weeds or grasses that are existing on the area that is to have sod installed. Using a non-selective herbicide will kill anything that it touches, so please follow the directions provided by the manufacturer. Once the herbicide is applied, you will need to wait 14-21 days before installing the sod. If you are planning to add topsoil, this is the time to do it.
Wagner Sod Company can provide this herbicide application if you do not wish to apply it yourself.

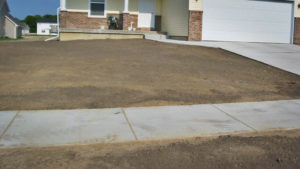
Finish Grading
This is quite possibly the most important task to do prior to installation. A properly graded area will give you proper drainage and eliminate any low/high areas in the yard. This can be a difficult process but the finished project relies on proper grading to look the best. It should be done as close to the installation time as possible to prevent any changes to the grade due to rain or traffic. If you have any sidewalks or driveways in the area to be sodded, we recommend that you cut the dirt along these areas down approximately 1” below the walkway/driveway.
Wagner Sod Company can provide finish grading if you do not wish to do it yourself.
Sod Installation
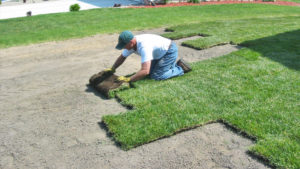
Sod installation should be done as soon as possible after the delivery of the sod. When laying the sod out, stagger the seams on each row so they do not line up with the row next to it. Make sure to pull the sod rolls tight to each other to prevent any gaps in the sod.
If installing sod on a hillside you should stake each of the rolls to the ground with wood sod stakes (2-3 per roll) to prevent washout in the event of heavy rains. Any areas that need to be shaped to fit existing landscaping should be done with a sharp utility knife. Once the install is complete, we recommend you use a lawn roller to eliminate any air pockets in the sod.
Watering New Sod
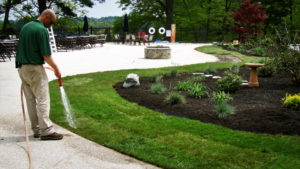
Watering should begin as soon as you can. This process should begin as soon as you have any area completed, and continue for each area as the sod is installed.
If you have an irrigation system, we recommend watering each zone as the sod is installed and then running a complete cycle on the entire property once the installation is complete.
After-Installation Care
The first 10 days after installation are the most important for healthy sod. Watering should be done two times a day—in the early morning and late afternoon—for two weeks. During this time, we recommend you avoid any traffic on the new sod if possible.
After two weeks, you can cut back the watering to one time a day in the morning. Before you mow the new turf, perform a tug test in multiple areas to ensure that it is rooting into the soil. The first mowing should be done on a high setting and bagged to avoid leaving the clippings behind.
Each time you mow, you can lower your cutting level bit-by-bit until you reach the desired height. At that point, mulch your clippings. It is best to mow on weekly basis from this point forward. For best results, after 3-4 weeks you can begin fertilizing your lawn on a regular 4-Step Program.
Beautify with Family Tradition
